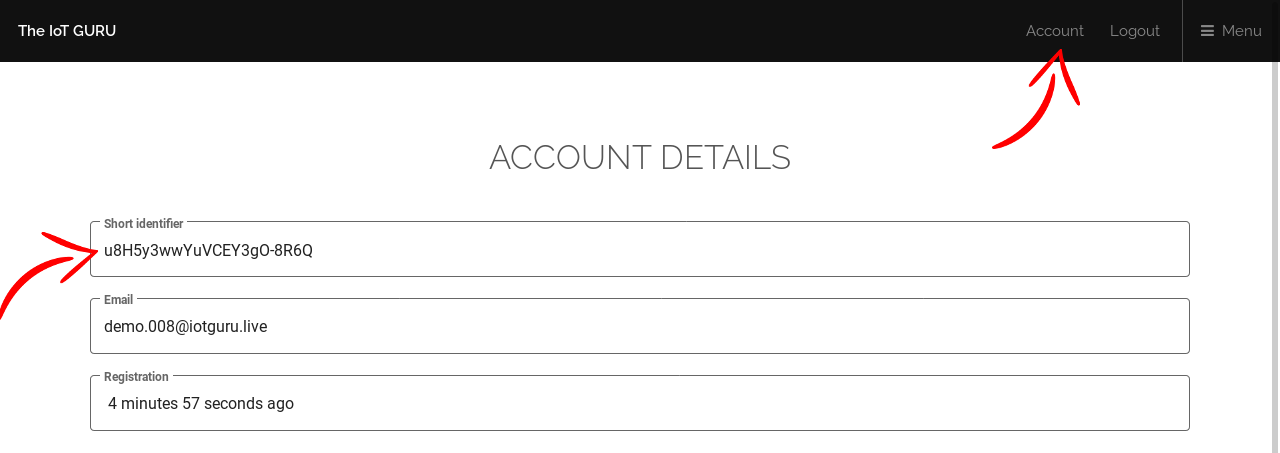
Step 0: Your short identifier
First of all, you will need your short identifier many times, locate it.
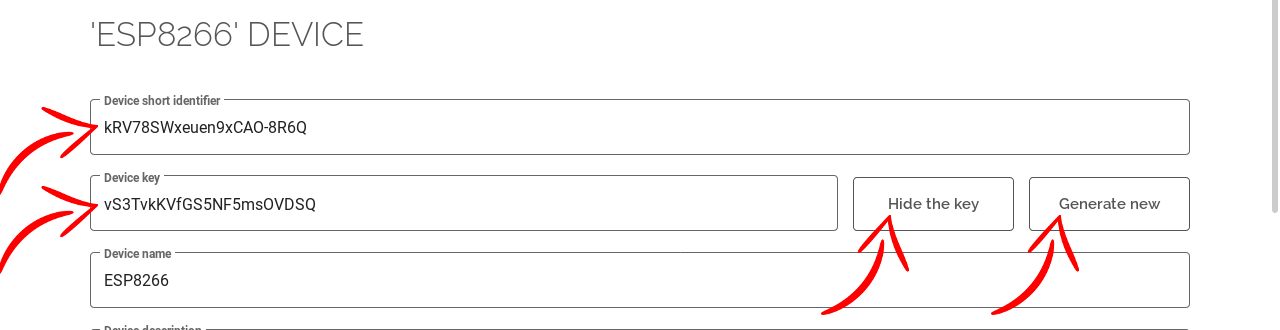
Also, you will need the short identifier and the key of one of your devices, locate it.
Step 1: Explore how to connect
To open connect to our MQTT server, you can choose from two protocols and two security schemes each.
MQTT
Default and widely supported protocol but communication is not secure.
- Server name: mqtt.iotguru.cloud
- Server port: 1883
Secure MQTT
Less supported protocol but communication is secure.
- Server name: mqtt.iotguru.cloud
- Server port: 8883
MQTT over WebSocket
Packets encapsulated by WebSocket frames but communication is not secure.
- Server name: mqtt.iotguru.cloud
- Server port: 80
MQTT over Secure WebSocket
Packets encapsulated by WebSocket frames but communication is secure.
- Server name: mqtt.iotguru.cloud
- Server port: 443
Step 2: Choose authentication
We provide two authentication schemes to you, you can choose one of them or both of them.
User credentials
Connect to MQTT server with your personal credentials and you can use it in a secure environment.
- User name: user short identifier
- Client id: user short identifier + something unique whatever
- Password: your actual password
Device credentials
Connect to MQTT server with one of your device credentials and you can use it in an insecure environment.
- User name: user short identifier
- Client id: device short identifier
- Password: device key
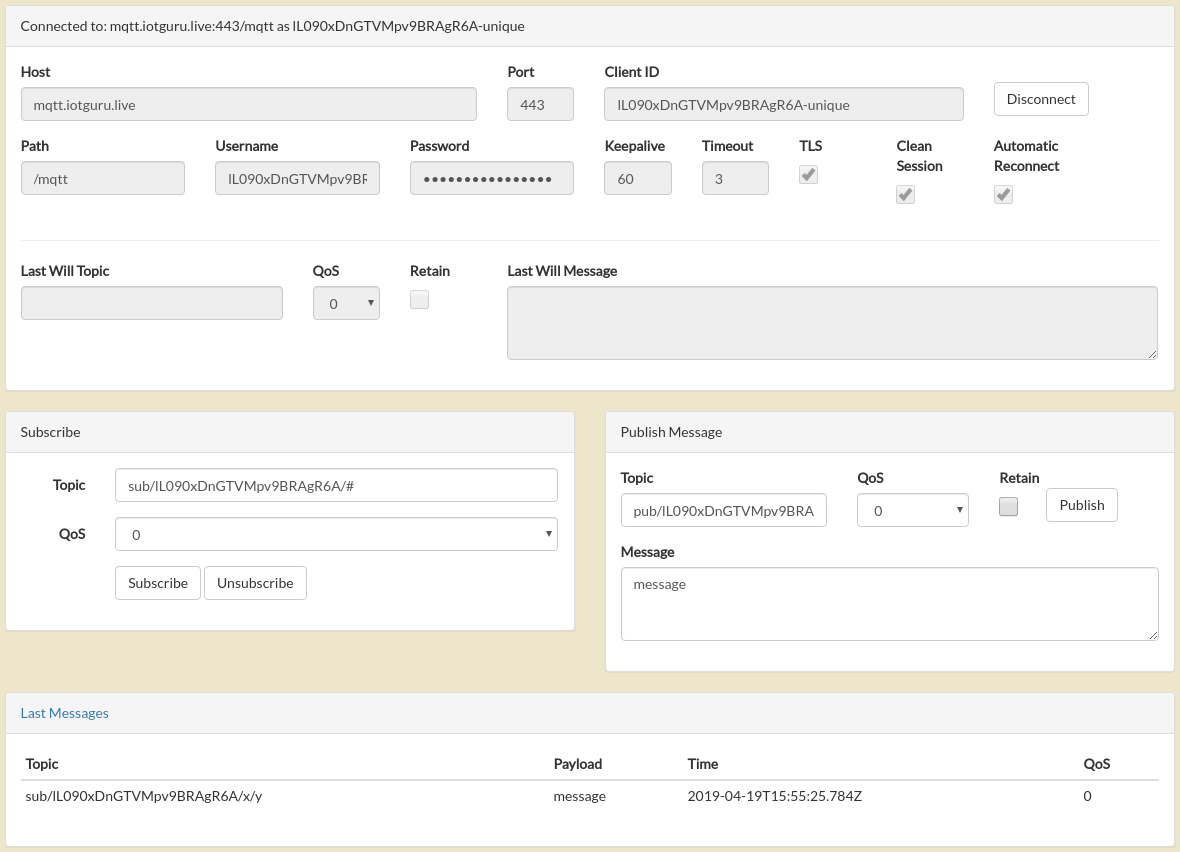
Step 3: Subscribe and publish on topics
You can access only your own topics, starts with your short identifier.
Subscribe
You can subscribe on everything of your MQTT tree or your can subscribe only to the partial branch of the MQTT tree:
- sub/{user short identifier}/#
- sub/{user short identifier}/{device short identifier}/#
- sub/{user short identifier}/{device short identifier}/{node short identifier}/#
- sub/{user short identifier}/{device short identifier}/{node short identifier}/{field name}
- pub/{user short identifier}/#
- pub/{user short identifier}/{device short identifier}/#
- pub/{user short identifier}/{device short identifier}/{node short
identifier}/#
Publish
You can publish everything on every topic in your user - device sub-tree:
- pub/{user short identifier}/{device short identifier}
- pub/{user short identifier}/{device short identifier}/{node short identifier}
- pub/{user short identifier}/{device short identifier}/{node short identifier}/{field name}
- pub/{user short identifier}/{device short identifier}/whatever
- pub/{user short identifier}/{device short identifier}/whatever/that/you/want
Quota
You can publish for free on your exact field address if the payload can be processed as number and the field type is
`input`:
- pub/{user short identifier}/{device short identifier}/{node short identifier}/{field name}
Otherwise we will route your published messages from pub/* topic to sub/* topic until the device reaches the daily (UTC) quota
limit.
Step 4: Connection example
You can try to connect with the PAHO online MQTT over WebSocket test
client.